Welcome! So you want to integrate Wavel with your Vimeo account. But you don’t know how to go about it?
Don’t worry! In this article, we will explain how you can integrate Wavel with Vimeo in 5 easy steps.
Step 1
First of all, visit https://developer.vimeo.com/.
Click New app on the top right corner and log in with your account on prompt.
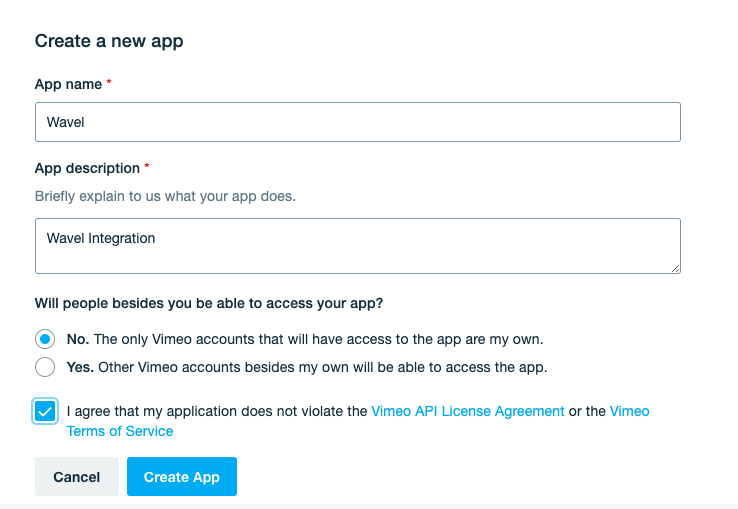
Once logged in, the below form will appear on your screen.

Fill in the details and click Create app.
Once done, Vimeo will redirect you to the page of your newly created app.
Step 2 (Optional)
Perform this step only in case you don’t want automatic captions upload.
In the Permissions section, click on Request Upload Access. Fill the form and wait for Vimeo to enable access.
Step 3
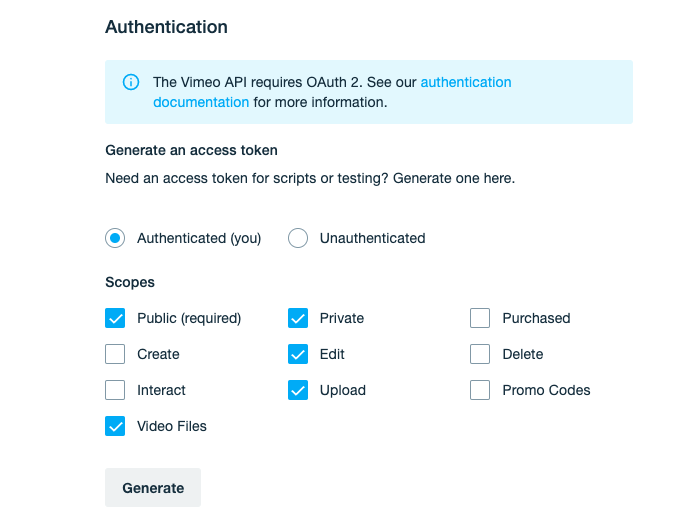
Once the upload access is enabled, go to the Authentication section and select Authenticated (you) radio button.
You must also select the following scopes while in the Authentication section: Public, Private, Edit, Upload, Video Files. NOTE: For Automatic Upload, you need to enable the Edit and Upload scopes.

Step 4
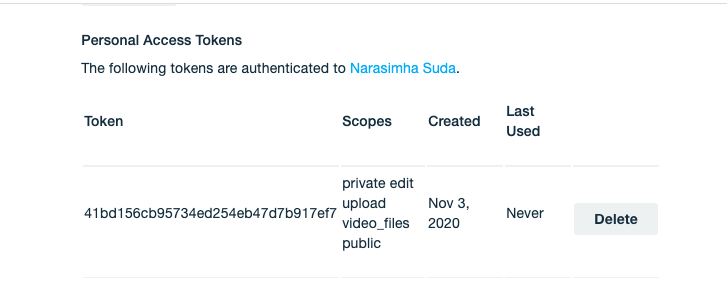
Finally, click Generate and copy the token that the site generates.

Step 5
Once you have copied the token, visit Wavel and log in to your account.
Go to Integrations and click Configure next to Vimeo. Paste the token that you had copied earlier and hit Save.
That’s it! If you click on Import from Vimeo on the Conversations page, you will see your uploaded videos.
We hope you found this article helpful while integrating your Vimeo account with Wavel.
Happy sharing knowledge with you,
Team Wavel
Home – Resources for Wavel Integrations
If you’d like additional help, feel free to mail us at reachout@wavel.ai.

.webp)


